
In Week 4, we connected our Spring Boot APIs to a real database using JPA and Hibernate.
Now, in Week 5, it’s time to secure your APIs with Spring Security and JWT (JSON Web Token) authentication — the standard for modern web and mobile apps.
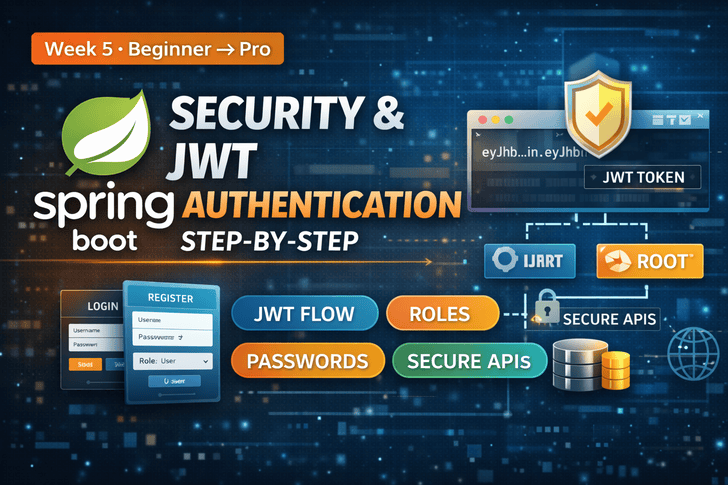
By the end of this article, your APIs will be protected, supporting login, registration, and role-based access control.
Why JWT + Spring Security?
Traditional session-based authentication has challenges:
- Hard to scale in microservices
- Requires server-side session storage
- Not mobile/web friendly
JWT solves these problems:
- Stateless authentication (no server session)
- Works across multiple services
- Easy to integrate with mobile and SPA frontends
Step 1: Add Dependencies
In your pom.xml:
<dependency>
    <groupId>org.springframework.boot</groupId>
    <artifactId>spring-boot-starter-security</artifactId>
</dependency>

<dependency>
    <groupId>io.jsonwebtoken</groupId>
    <artifactId>jjwt-api</artifactId>
    <version>0.11.5</version>
</dependency>
<dependency>
    <groupId>io.jsonwebtoken</groupId>
    <artifactId>jjwt-impl</artifactId>
    <version>0.11.5</version>
    <scope>runtime</scope>
</dependency>
<dependency>
    <groupId>io.jsonwebtoken</groupId>
    <artifactId>jjwt-jackson</artifactId>
    <version>0.11.5</version>
    <scope>runtime</scope>
</dependency>
This includes Spring Security + JJWT library for token generation and validation.
Step 2: User Entity & Roles
@Entity
@Table(name = "users")
public class User {
    @Id
    @GeneratedValue(strategy = GenerationType.IDENTITY)
    private Long id;

    private String username;

    private String password;

    private String role; // e.g., ROLE_USER, ROLE_ADMIN

    // Getters & Setters
}
Passwords must be hashed before storing. Never store plaintext passwords.
Step 3: Password Encryption
Use BCryptPasswordEncoder:
@Bean
public PasswordEncoder passwordEncoder() {
    return new BCryptPasswordEncoder();
}
Save user with encoded password:
user.setPassword(passwordEncoder.encode(userDTO.getPassword()));
userRepository.save(user);
Step 4: JWT Utility Class
@Component
public class JwtUtil {
    private final String SECRET_KEY = "your_secret_key_here";

    public String generateToken(UserDetails userDetails) {
        return Jwts.builder()
                .setSubject(userDetails.getUsername())
                .claim("role", userDetails.getAuthorities().toString())
                .setIssuedAt(new Date())
                .setExpiration(new Date(System.currentTimeMillis() + 1000 * 60 * 60)) // 1 hour
                .signWith(SignatureAlgorithm.HS256, SECRET_KEY)
                .compact();
    }

    public String extractUsername(String token) {
        return Jwts.parser().setSigningKey(SECRET_KEY)
                   .parseClaimsJws(token).getBody().getSubject();
    }

    public boolean validateToken(String token, UserDetails userDetails) {
        final String username = extractUsername(token);
        return username.equals(userDetails.getUsername()) && !isTokenExpired(token);
    }

    private boolean isTokenExpired(String token) {
        return Jwts.parser().setSigningKey(SECRET_KEY)
                   .parseClaimsJws(token).getBody().getExpiration().before(new Date());
    }
}
Step 5: UserDetails & Service
@Service
public class CustomUserDetailsService implements UserDetailsService {

    @Autowired
    private UserRepository userRepository;

    @Override
    public UserDetails loadUserByUsername(String username) throws UsernameNotFoundException {
        User user = userRepository.findByUsername(username)
                      .orElseThrow(() -> new UsernameNotFoundException("User not found"));

        return new org.springframework.security.core.userdetails.User(
                user.getUsername(),
                user.getPassword(),
                List.of(new SimpleGrantedAuthority(user.getRole()))
        );
    }
}
Step 6: Security Configuration
@EnableWebSecurity
public class SecurityConfig extends WebSecurityConfigurerAdapter {

    @Autowired
    private JwtFilter jwtFilter;

    @Autowired
    private CustomUserDetailsService userDetailsService;

    @Bean
    @Override
    public AuthenticationManager authenticationManagerBean() throws Exception {
        return super.authenticationManagerBean();
    }

    @Override
    protected void configure(HttpSecurity http) throws Exception {
        http.csrf().disable()
            .authorizeRequests()
            .antMatchers("/api/auth/**").permitAll()
            .anyRequest().authenticated()
            .and()
            .sessionManagement().sessionCreationPolicy(SessionCreationPolicy.STATELESS);

        http.addFilterBefore(jwtFilter, UsernamePasswordAuthenticationFilter.class);
    }

    @Override
    protected void configure(AuthenticationManagerBuilder auth) throws Exception {
        auth.userDetailsService(userDetailsService)
            .passwordEncoder(passwordEncoder());
    }
}/api/auth/**→ Public endpoints (login/register)- All other endpoints → Protected
- Stateless sessions → JWT-based
Step 7: Authentication Controller
@RestController
@RequestMapping("/api/auth")
public class AuthController {

    @Autowired
    private AuthenticationManager authenticationManager;

    @Autowired
    private JwtUtil jwtUtil;

    @Autowired
    private CustomUserDetailsService userDetailsService;

    @PostMapping("/login")
    public ResponseEntity<String> login(@RequestBody AuthRequest request) throws Exception {
        try {
            authenticationManager.authenticate(
                new UsernamePasswordAuthenticationToken(request.getUsername(), request.getPassword())
            );
        } catch (BadCredentialsException e) {
            throw new Exception("Incorrect username or password", e);
        }

        final UserDetails userDetails = userDetailsService.loadUserByUsername(request.getUsername());
        final String jwt = jwtUtil.generateToken(userDetails);
        return ResponseEntity.ok(jwt);
    }
}
AuthRequest DTO:
public class AuthRequest {
    private String username;
    private String password;
    // Getters & Setters
}
Step 8: Role-Based Access Example
@GetMapping("/admin")
@PreAuthorize("hasRole('ADMIN')")
public String adminEndpoint() {
    return "Admin content";
}

@GetMapping("/user")
@PreAuthorize("hasAnyRole('USER','ADMIN')")
public String userEndpoint() {
    return "User content";
}
Spring Security automatically restricts endpoints based on roles defined in your JWT.
Step 9: Testing Your Secured API
- Register user →
POST /api/auth/register(optional) - Login →
POST /api/auth/login→ Receive JWT token - Access protected endpoints → Add header:
Authorization: Bearer <JWT_TOKEN>Week 5 Recap
✅ Spring Security setup
✅ JWT authentication flow
✅ Password hashing
✅ Role-based access control
✅ Securing REST APIs
Your backend is now production-ready for authentication.
What’s Next? (Week 6)
👉 Professional Error Handling & Logging in Spring Boot
We’ll cover:
- Global exception handling
- Custom exceptions
- Logging with SLF4J & Logback
- Production logging strategies
📌 Action Items
✔ Implement login & JWT authentication
✔ Protect all REST endpoints
✔ Test role-based access with Postman
✔ Push secured code to GitHub